Aadhaar

When Aadhaar Update Is Mandatory and When It Is Not
Aadhaar

When Aadhaar Update Is Mandatory and When It Is Not

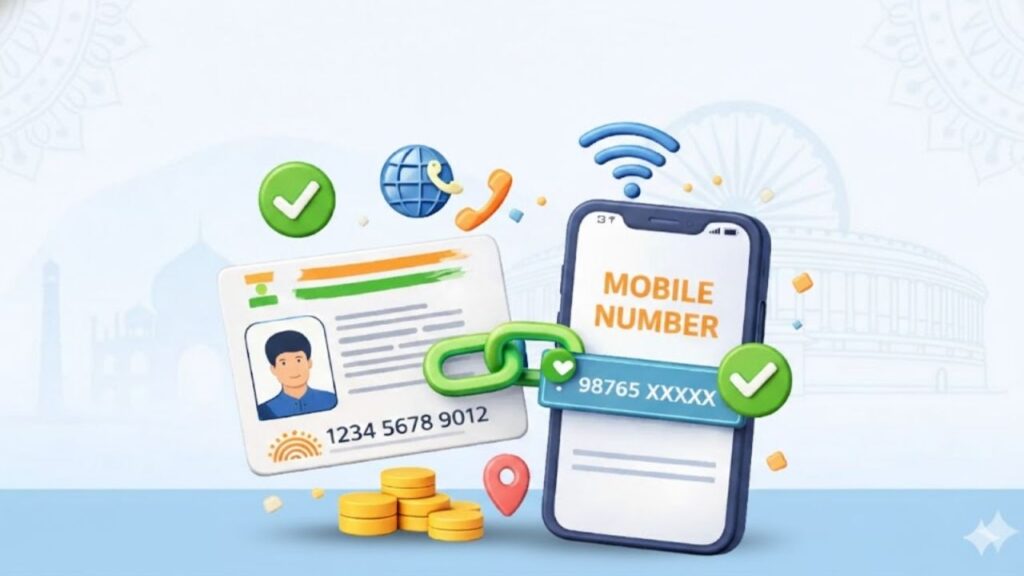
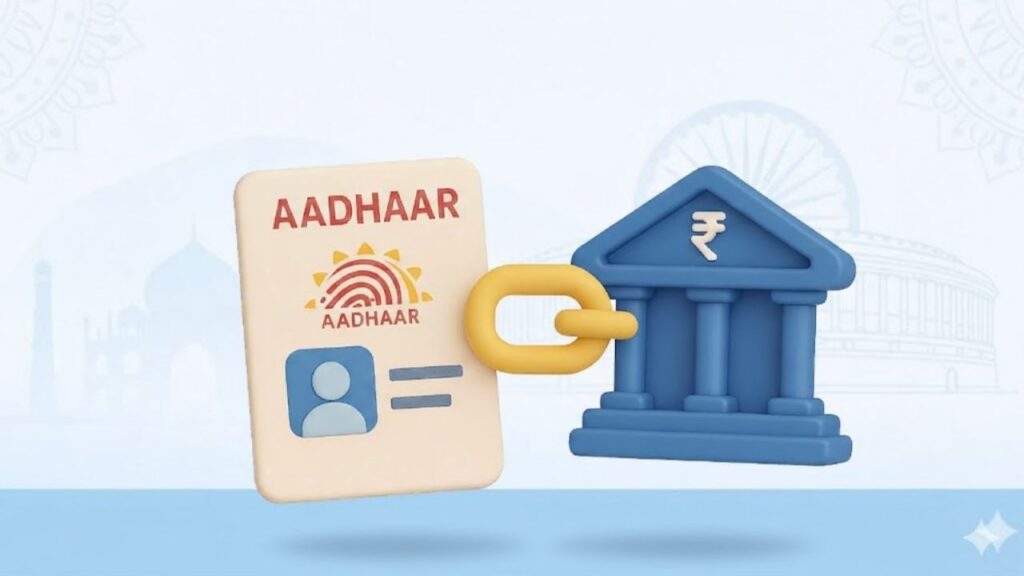
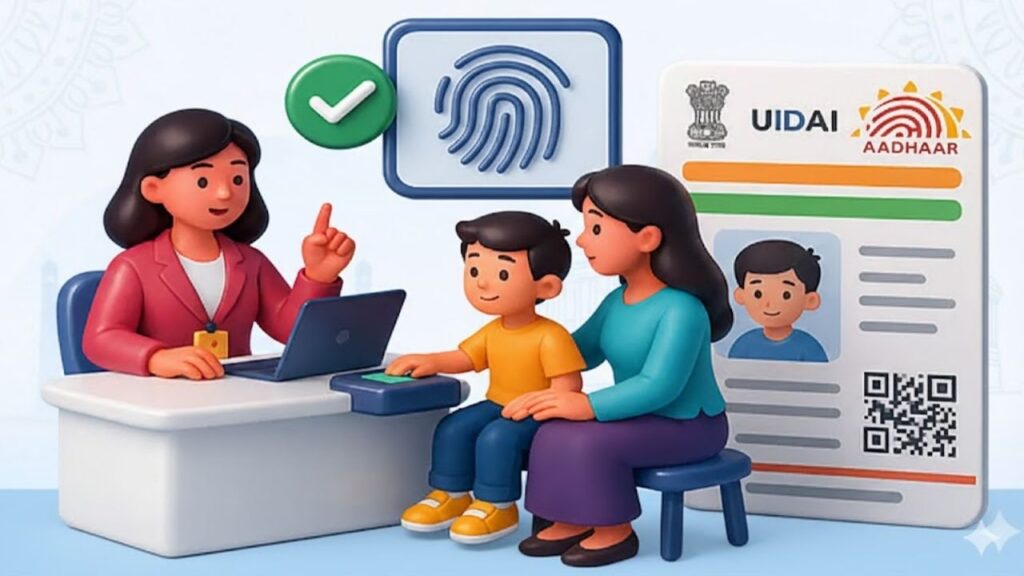
Many people worry about Aadhaar updates because banks, government offices, and service providers often ask for “updated Aadhaar.” However, not every Aadhaar holder is required to update their details every time. Knowing exactly when Aadhaar update is mandatory and when it is optional can save you from unnecessary visits, rejections, and confusion. This guide explains real-life situations where Aadhaar updates are compulsory, cases where they are not required, and how ignoring mandatory updates can cause serious problems. ⭐ Why Aadhaar Updates Matter in Real Life Aadhaar is used for banking, subsidies, SIM verification, tax filing, and many government services. If your Aadhaar details are outdated or incorrect, it can lead to: That’s why UIDAI has clearly defined mandatory and non-mandatory Aadhaar update rules. ⭐ When Aadhaar Update Is Mandatory 📌 Change in Name If your name has changed due to: Updating Aadhaar is mandatory, especially for banking, passport, PAN, and government records. 📌 Change in Address You must update Aadhaar if: Address mismatch is one of the most common reasons for Aadhaar-based service rejection. 📌 Biometric Update (Age-Based Rule) Biometric updates are compulsory at specific ages: Without these updates, Aadhaar may fail authentication in the future. 📌 Photo Mismatch If your Aadhaar photo: Many banks and offices may reject Aadhaar verification, making photo update practically mandatory. 📌 Mobile Number Change (Practical Mandatory) While UIDAI does not legally force mobile updates, it becomes mandatory if: Without a linked mobile number, Aadhaar services become nearly unusable. 📌 Errors in Date of Birth or Gender If DOB or gender is incorrect: Correction becomes mandatory in such cases. ⭐ When Aadhaar Update Is NOT Mandatory ✅ No Change in Personal Details If your: are correct and unchanged, no update is required, even if Aadhaar is several years old. ✅ Aadhaar Validity Has No Expiry Aadhaar never expires. There is no rule that Aadhaar must be updated every 5 or 10 years unless details have changed. ✅ Old Aadhaar Still Works Even older Aadhaar cards: As long as details are accurate and biometrics are updated (where required). ✅ Optional Photo Update If your photo is old but still recognizable, updating it is optional, not compulsory. ⭐ What Happens If You Skip Mandatory Aadhaar Updates Failing to update Aadhaar when required can lead to: Checking your Aadhaar update history helps confirm whether all required updates are already completed. ⭐ How to Know If Your Aadhaar Needs an Update You should review your Aadhaar details if: In such cases, booking an Aadhaar appointment ensures faster and correct updates. ⭐ Common Mistakes People Make Avoiding these mistakes prevents long-term issues. 🔚 Conclusion Aadhaar update is mandatory only in specific situations, not for everyone. If your details are correct and biometrics are updated as required, there is no need for unnecessary changes. However, ignoring mandatory updates can block essential services and benefits. Understanding these rules helps you stay compliant without wasting time. For clear, practical guidance on Aadhaar, banking, and government documentation, visit Sarkari Bakery. ❓ Frequently Asked Questions

How Aadhaar QR Code Works and Where It Is Used
Aadhaar

How Aadhaar QR Code Works and Where It Is Used

Many people notice a black-and-white square printed on their Aadhaar card but don’t fully understand its importance. This Aadhaar QR Code is not just a design element—it plays a major role in identity verification, security, and quick authentication. Today, Aadhaar QR codes are widely accepted across banks, government offices, and private institutions because they reduce fraud and speed up verification. Understanding how the Aadhaar QR code works can help you use it correctly and avoid unnecessary document rejections. ⭐ What Is an Aadhaar QR Code? The Aadhaar QR Code is a digitally signed, encrypted code generated by UIDAI and printed on Aadhaar cards (both physical and e-Aadhaar). It stores verified Aadhaar details in a machine-readable format. Unlike photocopies or screenshots, the QR code carries tamper-proof data that can be instantly validated using UIDAI-authorised scanners. ⭐ What Information Is Stored in Aadhaar QR Code? The QR code contains limited but verified information, such as: This data cannot be edited or altered manually, which makes it highly reliable. ⭐ How Aadhaar QR Code Works (Step-by-Step) Here’s how the Aadhaar QR code verification process works in real life: This entire process takes just a few seconds. ⭐ Why Aadhaar QR Code Is Considered Secure Aadhaar QR codes are safer than photocopies because: This makes QR-based Aadhaar verification ideal for quick identity checks. ⭐ Where Aadhaar QR Code Is Commonly Used Banking and Finance Government Services Employment and Education Travel and SIM Verification If your Aadhaar details are outdated, you should complete the update first. Checking your Aadhaar update history helps confirm whether the QR data is current. ⭐ Difference Between Aadhaar QR Code and Photocopy Aadhaar QR Code Aadhaar Photocopy Digitally verified Easy to tamper UIDAI signed No authenticity check Works offline Needs manual verification More secure Risk of misuse Because of these differences, many offices now prefer QR code scanning over paper copies. ⭐ Masked Aadhaar QR Code – What You Should Know Masked Aadhaar also contains a QR code, but: This is ideal when you want to protect your Aadhaar number but still prove identity. ⭐ Common Problems People Face With Aadhaar QR Code Some frequent issues include: If your QR code is not readable, downloading a fresh e-Aadhaar or visiting an Aadhaar centre via Aadhaar appointment is the best solution. ⭐ Is Aadhaar QR Code Mandatory Everywhere? Not legally mandatory, but widely accepted and preferred. Many institutions ask for Aadhaar QR code because: In practical terms, QR code-based Aadhaar is becoming the default identity method. ⭐ When Should You Update Aadhaar QR Code? You should update Aadhaar if: After any update, a new QR code is generated automatically. 🔚 Conclusion The Aadhaar QR code is a powerful, secure, and fast identity verification tool that simplifies everyday processes—from banking to government services. Knowing how it works helps you avoid rejections, delays, and unnecessary document hassles. Keeping your Aadhaar details updated ensures the QR code always reflects accurate information. For clear, practical explanations of Aadhaar, banking, and government documentation in simple language, visit Sarkari Bakery. ❓ Frequently Asked Questions

Why Mobile Number Linking With Aadhaar Is Important
Aadhaar

Why Mobile Number Linking With Aadhaar Is Important

Many people face sudden issues while accessing government services, banking, or subsidies—OTP not received, verification failed, or services blocked. In most cases, the root cause is simple: the mobile number is not linked with Aadhaar or is outdated. Aadhaar is no longer just an identity document; it works as a live verification system, and your mobile number plays a critical role in it. Understanding why mobile number linking with Aadhaar is important can help you avoid service disruptions, failed applications, and unnecessary visits to government offices. ⭐ What Does Linking a Mobile Number With Aadhaar Mean? Linking a mobile number with Aadhaar means registering your active phone number in the UIDAI database. This number is used for: Without a linked mobile number, Aadhaar becomes a limited-use document instead of a fully functional digital ID. ⭐ Why Aadhaar-Mobile Linking Is Crucial Today Aadhaar authentication has shifted heavily towards digital verification. Most services now depend on OTP confirmation sent to the registered mobile number. Key reasons why linking is essential: This is why Aadhaar-linked mobile numbers are mandatory for many online and offline processes. ⭐ Where Aadhaar-Linked Mobile Number Is Required A linked mobile number is needed across multiple sectors: Government Services Banking & Finance If you are completing PAN-related formalities, Aadhaar OTP is often required during PAN linking and verification steps. ⭐ Role of Mobile Number in Aadhaar Authentication Whenever Aadhaar is used for verification, UIDAI checks whether the request is authorised by the Aadhaar holder. This happens through: Without this step, Aadhaar authentication fails, even if all details are correct. ⭐ What Happens If Mobile Number Is Not Linked? If your mobile number is not linked with Aadhaar, you may face: Many users discover this problem only when an urgent service fails. ⭐ Common Mistakes People Make These mistakes often lead to Aadhaar-related issues: If your number has changed, booking an Aadhaar appointment for update is the safest way to fix it. ⭐ Is Mobile Number Linking Mandatory? Technically, Aadhaar can exist without a mobile number. However, most Aadhaar-based services will not work without it. In practical terms: That’s why linking is strongly recommended even if not legally mandatory in every case. ⭐ How Secure Is Aadhaar Mobile Linking? UIDAI has strict security protocols: Your mobile number acts as a security layer, not a risk, when used correctly. ⭐ When Should You Update Your Aadhaar Mobile Number? You should update immediately if: Delaying the update can cause repeated failures across multiple services. 🔚 Conclusion Linking your mobile number with Aadhaar is no longer optional in real-life usage. It is the key to authentication, security, and uninterrupted access to banking, government schemes, and digital services. A small update today can save you from major problems later. For clear, practical guidance on Aadhaar updates, banking rules, and government documentation explained in simple language, visit Sarkari Bakery. ❓ Frequently Asked Questions

How Aadhaar Is Used in Banking and KYC Verification
Aadhaar

How Aadhaar Is Used in Banking and KYC Verification

Opening a bank account, updating details, or completing KYC used to mean standing in long queues with multiple documents. Aadhaar changed that experience completely. Today, Aadhaar is at the core of banking and KYC verification in India, making identity checks faster, safer, and more reliable. Banks rely on Aadhaar not just as an ID proof, but as a real-time verification tool that reduces fraud and simplifies customer onboarding. ⭐ Why Banks Rely on Aadhaar for KYC Banks must follow strict Know Your Customer (KYC) norms set by regulators to prevent fraud, money laundering, and identity misuse. Aadhaar helps banks because: Unlike older documents, Aadhaar is linked with fingerprints, iris scans, and a central database, making impersonation extremely difficult. ⭐ How Aadhaar-Based KYC Works in Banking Aadhaar-based KYC works through electronic verification instead of physical document checks. Step-by-step process: This process is known as e-KYC, and it can be completed within minutes without submitting photocopies. ⭐ Types of Aadhaar KYC Used by Banks Banks use Aadhaar in different ways depending on the service: ✔️ Aadhaar OTP-based e-KYC ✔️ Biometric Aadhaar KYC ✔️ Offline Aadhaar Verification Each method balances convenience and privacy based on customer choice. ⭐ Where Aadhaar Is Used in Banking Services Aadhaar plays a role across multiple banking activities: For many services, Aadhaar-based KYC avoids repeated document submission. ⭐ Aadhaar Linking and Compliance Requirements Banks often require Aadhaar linkage to comply with government regulations, especially for: This is similar to how Aadhaar is required in PAN linking, where mismatches can lead to restrictions on financial services. ⭐ Security and Privacy in Aadhaar-Based KYC Many users worry about data misuse. In reality, Aadhaar-based banking verification follows strict safeguards: Using offline Aadhaar or QR-based verification further reduces data exposure. ⭐ Common Problems Customers Face with Aadhaar KYC Despite its benefits, Aadhaar KYC can fail due to small issues: In such cases, booking an Aadhaar appointment to update details usually resolves the issue quickly. ⭐ Aadhaar vs Other KYC Documents in Banking While Aadhaar is widely used, banks still accept alternatives: However, Aadhaar remains the fastest option because it enables instant digital verification, unlike manual document checks. ⭐ Consequences of Not Completing Aadhaar KYC If Aadhaar-based KYC is incomplete or outdated: Regular KYC updates ensure uninterrupted banking access. 🔚 Conclusion Aadhaar has become the backbone of banking and KYC verification in India. From opening accounts to preventing fraud, it simplifies processes while improving security. When used correctly—with updated details and proper consent—it saves time for both banks and customers. For clear guidance on Aadhaar, banking rules, and official documentation explained in simple terms, visit Sarkari Bakery. ❓ Frequently Asked Questions

Aadhaar Card Appointment
Aadhaar

⭐ Aadhaar Card Appointment: How to Book an Appointment for Aadhaar Card Update or New Aadhaar?

Whether you want to update your Aadhaar details or apply for a fresh Aadhaar card, the UIDAI now allows you to book an Aadhaar card appointment online. This makes the process faster, smoother, and more convenient—no more waiting in long queues at Aadhaar Seva Kendra (ASK). ⭐ What Is an Aadhaar Card Appointment? UIDAI provides an online facility where residents can schedule an appointment at their nearest Aadhaar Seva Kendra. Using this service, you can choose a date and time slot based on availability. You can book an appointment for: Key points: ⭐ Benefits of Booking an Aadhaar Appointment Online Booking an Aadhaar appointment online offers several advantages: ✔ Avoid long queues at ASK You can pick your preferred date and time, which reduces waiting time. ✔ Smooth and fast service Pre-scheduled appointments get priority handling at Aadhaar centers. ✔ Convenient for families Multiple family members can book slots from the same number. ✔ Saves time No need to walk in and wait for hours. ⭐ How to Book an Appointment for Aadhaar Card Update (Step-by-Step Guide) Follow these steps to book your Aadhaar appointment online: Step 1: Visit the official UIDAI website (uidai.gov.in) Step 2: Click on “My Aadhaar” → “Book an Appointment” Step 3: Select your city or Aadhaar Seva Kendra Step 4: Enter your mobile number and captcha Click Get OTP. Step 5: Enter OTP and proceed Step 6: Fill in your Aadhaar details and choose update services (Example: name update, address update, biometric update, mobile number update, etc.) You can pay fees online or at the center. Step 7: Choose your preferred date and time Step 8: Confirm the appointment Your appointment slip will appear on the screen. ⭐ Which Aadhaar Services Can You Access with an Appointment? You can complete the following services at Aadhaar Seva Kendra: ⭐ How to Cancel an Aadhaar Appointment? If you cannot visit the Aadhaar center, you can cancel your appointment online. Steps to Cancel Appointment: Your appointment will be cancelled instantly. ⭐ How to Reschedule an Aadhaar Appointment? If you want to change the date and time instead of canceling, follow these steps: Your new appointment details will be displayed on the screen. ⭐ Documents Required for Aadhaar Enrollment & Update UIDAI accepts the following documents: 📌 Proof of Identity (POI) 📌 Proof of Address (POA) 📌 Proof of Date of Birth (DOB) 📌 Proof of Relationship (POR) ⭐ How to Download Aadhaar Appointment Form To download your appointment slip: Your PDF will be saved to your device. ⭐ Aadhaar Update Charges at Aadhaar Seva Kendra Service Charges Aadhaar Enrollment Free Mandatory Biometric Update (Age 5–17) Free Any Biometric Update ₹100 Demographic Update (with biometric) Free Demographic Update (without biometric) ₹50 Document Update (Online myAadhaar) Free Document Update (At Aadhaar Centre) ₹50 ⭐ Important Tips Before Booking Your Aadhaar Appointment ✔ Appointment is optional, but recommended✔ You can book up to 4 appointments per month✔ Aadhaar-linked mobile number is not compulsory✔ Ensure you carry the correct documents✔ Reach the center 10–15 minutes early✔ There are limits on Aadhaar updates: If limits exceed, you must visit a Permanent Enrollment Centre. ⭐ Final Words Booking an Aadhaar appointment online is one of the easiest ways to avoid crowds and complete your Aadhaar-related work smoothly. Whether updating details or enrolling for the first time, choosing your own date and time ensures a comfortable and stress-free experience. Always carry valid documents, fill in details carefully, and reach on time to complete the process without delays. ⭐ FAQs

Aadhaar Update History
Aadhaar

⭐ Aadhaar Update History: Check How Many Times You Have Updated Your Aadhaar Card

Every Indian who holds an Aadhaar number should know not just what their Aadhaar contains, but also how often and when those details were changed. UIDAI records every update made to an Aadhaar — name, address, mobile number, biometrics, and even authentication events. This record is called your Aadhaar Update History, and it helps you track changes, detect unauthorized edits, and keep your identity secure. 🔍 What is Aadhaar Update History? Aadhaar Update History is a chronological log maintained by UIDAI that lists every update request linked to your Aadhaar number. It shows: This history helps you confirm that only authorized changes have been made to your Aadhaar. ✅ Why should you check your Aadhaar Update History? Checking this history is important because: 🧾 What types of updates are recorded? UIDAI stores records for: Note: Authentication logs are limited — UIDAI shows recent authentication events (e.g., last 50 attempts in previous 6 months). 🖥️ How to Check Aadhaar Update History — Step-by-step You can view your Aadhaar update history only from the UIDAI official website and only if your mobile number is linked with Aadhaar (OTP is required). Follow these steps: Step 1 — Open UIDAI website Go to: https://uidai.gov.in/ Step 2 — Navigate to “My Aadhaar” → “Update Aadhaar Online” On the UIDAI homepage, find the My Aadhaar section. Under it, click Aadhaar Update History (or similar link). Step 3 — Enter your Aadhaar number and captcha Type your 12-digit Aadhaar number (or Virtual ID if you prefer) and the captcha code shown on screen. Step 4 — Send OTP and verify Click Send OTP. You will get a one-time password on the mobile number currently linked with your Aadhaar. Enter the OTP and press Submit. Step 5 — View your update history After verification, the page will show a list of update requests: each entry with URN, date, type of update, and status (completed/pending/rejected). You can expand entries for more details. 💾 How to Save / Download Your Aadhaar Update History There’s no direct “download” button, but you can save a copy: Always keep these PDFs/screenshots safe — they contain sensitive info. 🔎 Details You’ll See in the Update History Each row or record typically contains: This information helps you quickly trace and verify any change. ⚠️ Things to Remember When Checking Your Aadhaar Update History 🕒 How long does an update take to reflect? 🔐 What to do if you find unauthorized updates? Act quickly — early reporting helps resolve issues faster. ✅ Quick Tips 📌 Frequently Asked Questions (FAQ) 🔚 Final Words Your Aadhaar update history is a compact but powerful record — it protects you and helps keep your identity safe. Make it a habit to check the history occasionally, especially after any change (address, mobile, biometrics). If something looks wrong, act fast and contact UIDAI with the URN details.

Aadhaar Fingerprint Update
Aadhaar

⭐ Aadhaar Fingerprint Update: Complete Guide for Everyone

If your Aadhaar fingerprint is not getting verified at the bank, CSC centre, or during any government scheme authentication, then it’s time to update your Aadhaar biometrics. This problem is very common among senior citizens, workers, farmers, and people whose fingerprints have faded over time. In this simple and detailed guide, we will explain what Aadhaar fingerprint update is, why it’s important, and how you can get it done step by step. 🌟 What Is Aadhaar Fingerprint Update? Aadhaar Fingerprint Update is a process where your old or unclear fingerprints are refreshed in the UIDAI database.Over time, some people face issues like: Updating your fingerprints solves all these issues and makes Aadhaar authentication smooth everywhere. 🎯 Who Needs Aadhaar Fingerprint Update? You should update your fingerprints if: If any of these apply to you, fingerprint update is necessary. 🏢 Where Can You Update Aadhaar Fingerprints? Fingerprint update is NOT available online. You can update it at: ✔ Aadhaar Seva Kendra (ASK) ✔ Authorized Bank Aadhaar Centres ✔ Post Office Aadhaar Units ✔ CSC Centres authorized for Aadhaar Biometric Update Make sure the center is UIDAI-approved. 📄 Documents Required for Aadhaar Fingerprint Update Good news — you only need: 👉 Aadhaar Card or Aadhaar Number No extra documents are needed unless you want to update demographic details. 💰 Aadhaar Fingerprint Update Fee UIDAI has fixed the fee: ₹50 (Inclusive of GST) All authorized centers must follow this fee. Do not pay extra. 📌 Important Before You Visit the Aadhaar Center To ensure a successful fingerprint scan: This helps improve biometric capture quality. 🔧 Step-by-Step Process: How to Update Aadhaar Fingerprints Step 1: Visit the nearest Aadhaar update center Go to ASK, bank, post office, or authorized CSC offering biometric updates. Step 2: Tell the operator you want “Biometric Update – Fingerprint Update” This ensures they start the correct process. Step 3: Provide your Aadhaar number They will enter your Aadhaar details for verification. Step 4: Capture new fingerprints The operator will ask you to place your fingers one by one on a certified biometric scanner. Step 5: Live photograph (if required) Sometimes UIDAI requires fresh live photos. Step 6: Pay ₹50 fee You will receive a printed or digital receipt. Step 7: Collect your URN slip This slip contains a Update Request Number (URN), used for tracking. ⏳ How Long Does the Update Take? UIDAI usually updates your fingerprints in: 3 – 7 days Sometimes it may take up to 15 days. 🖥 How to Check Aadhaar Fingerprint Update Status? If approved → Your fingerprints are updated successfully. ⚠️ Why Fingerprint Updates Fail? Some possible reasons: If your update fails, you can try again at another authorized centre. 🎉 Tips to Ensure Successful Fingerprint Update These simple steps ensure smooth authentication for government schemes and banking services. 📚 FAQ (Your Required Code Format – English Only) 📝 Conclusion Aadhaar fingerprint update is a simple but important process, especially if your fingerprints are not being recognized during authentication. It ensures smooth access to bank services, government schemes, CSC services, subsidies, and more. If you are facing any biometric issues, visit your nearest authorized center and update your fingerprints today. For more helpful government service guides, visit 👉 Sarkari Bakery

how to update Aadhaar mobile number
Aadhaar

⭐ Aadhaar Mobile Number Update – A Simple and Complete Guide for Everyone

Aadhaar has become one of the most important identity documents in India. Whether you want to apply for a government scheme, open a bank account, update your KYC, or use online services like DigiLocker and UMANG — you need your mobile number linked with Aadhaar.If your mobile number is old, lost, inactive, or you want to change it, you must update it in Aadhaar records. This blog will help you understand how to update Aadhaar mobile number, step-by-step, in a very simple way so that even first-time users can follow it easily. ⭐ What Is Aadhaar Mobile Number Update? Aadhaar mobile number update means changing your registered mobile number to a new number or adding a number if no number was registered previously.Whenever you use Aadhaar services, UIDAI sends an OTP to your registered number for verification. So, if the mobile number is incorrect or inactive, you won’t be able to complete any Aadhaar-based tasks. ⭐ Why Is It Important to Update Aadhaar Mobile Number? Updating your mobile number in Aadhaar is extremely important because: ✔ You need OTP for all Aadhaar services ✔ You need OTP to download e-Aadhaar ✔ You need it for PAN-Aadhaar linking ✔ Required for government scheme applications ✔ Needed for bank KYC and account verification ✔ Important for online Aadhaar updates ✔ Needed for DigiLocker, UMANG, and other apps ✔ Required for SIM card verification Without a linked mobile number, many services will simply not work. ⭐ Who Should Update Their Aadhaar Mobile Number? You should update your Aadhaar mobile number if: ⭐ Ways to Update Aadhaar Mobile Number There are two ways to update the mobile number: 1️⃣ Update at CSC Centre or Aadhaar Seva Kendra (Most Preferred) This is the most common and easiest method, especially for people living in villages or small towns. 📌 Documents Required You do not need any document.Only biometric verification (fingerprint/iris) is necessary. 📌 Step-by-Step Process 💰 Fee Structure Fixed charge by UIDAI: ₹50 only This includes: 2️⃣ Update Aadhaar Mobile Number Online (Only If Old Number is Active) You can update your mobile number online only when: ✔ Your old mobile number is linked with Aadhaar✔ You can receive OTP on old number If your old number is inactive, online update is not possible. 📌 Steps to Update Online If you cannot receive OTP on your old number, you must visit a CSC centre. ⭐ How Long Does the Aadhaar Mobile Number Update Take? UIDAI sometimes takes longer due to verification delays. ⭐ How to Check Aadhaar Mobile Number Update Status? If updated, you will see the message:“Your mobile number has been successfully updated.” ⭐ What Happens After Updating Your Mobile Number? Once your number is updated: ✔ You can receive OTP for Aadhaar services✔ You can download e-Aadhaar easily✔ You can update address and other details online✔ You can apply for government schemes that need mobile verification✔ You can use DigiLocker & UMANG without issues✔ Bank KYC becomes easier and faster ⭐ Common Problems People Face (And Solutions) ❌ Problem: Old mobile number lost 👉 Solution: Visit CSC centre (biometric required) ❌ Old mobile number active but not receiving OTP 👉 Restart phone, check network, try after 10 minutes ❌ Update taking too long 👉 Check status with URN👉 If stuck for more than 30 days, visit Aadhaar centre again ❌ Biometric mismatch 👉 Try again or update biometrics first at Aadhaar Seva Kendra ⭐ Important Tips Everyone Should Follow ✔ Always keep your mobile number active✔ Don’t share your OTP with anyone✔ Check the number twice before submitting✔ Update only at authorised CSC/Aadhaar centres✔ Keep your Aadhaar receipt safely✔ Avoid agents or unregistered shops ⭐ FAQs ⭐ Conclusion Updating your mobile number in Aadhaar is a simple process but extremely important for using government schemes, banking services, and online applications. Whether you get it done at a CSC centre or online (if possible), make sure your number is always active and correct. For more simple guides on government services, visit:👉 Sarkari Bakery

Aadhaar

Aadhaar DOB Correction: Complete Step-by-Step Guide

Your Aadhaar Card is one of the most important identity documents in India. It contains your name, address, mobile number, and most importantly — your Date of Birth (DOB). If the DOB printed on your Aadhaar is wrong or needs updating, you must apply for Aadhaar DOB Correction as soon as possible. An incorrect DOB can cause major problems in: This guide explains everything you need to know about Aadhaar DOB Correction, including the documents required, online/offline process, fees, and important rules updated by UIDAI. What is Aadhaar DOB Correction? Aadhaar DOB Correction means updating or fixing your Date of Birth in the Aadhaar database if it is incorrect, incomplete, or mismatched. UIDAI allows residents to update their DOB only once in their lifetime, unless there is a strong exception approved by UIDAI. So, entering the correct DOB is extremely important. When Is Aadhaar DOB Correction Required? You should correct your date of birth in Aadhaar if: Documents Required for Aadhaar DOB Correction UIDAI accepts only specific PoDoB (Proof of Date of Birth) documents. Some valid documents include: Make sure the DOB clearly matches the date you want to update. Aadhaar DOB Correction Online (If Available) (Online DOB update is available only for certain users when UIDAI enables it temporarily.) If your Aadhaar shows the option for DOB update online, follow these steps: Step-by-Step Online Process Step 1: Visit UIDAI Portal Go to the official UIDAI website:https://myaadhaar.uidai.gov.in Step 2: Login Click “Login” → Enter Aadhaar Number → Enter OTP. Step 3: Select ‘Update Demographics’ Choose Aadhaar DOB Correction / Update DOB. Step 4: Upload Document Upload a valid PoDoB document (PDF/JPEG). Step 5: Pay Fees Pay the fee (usually ₹50). Step 6: Submit Request You will receive a URN (Update Request Number) to track your Aadhaar DOB correction status. Aadhaar DOB Correction at Aadhaar Centre (Most Recommended) Since DOB is an important demographic detail, most users will need to update it at the Aadhaar Seva Kendra (ASK) or any Aadhaar Enrollment Centre. Step-by-Step Offline Process Step 1: Find a Nearby Aadhaar Centre Visit:https://myaadhaar.uidai.gov.in/appointmentChoose Update Aadhaar. Step 2: Book an Appointment Booking is optional but saves time. Step 3: Visit the Centre Carry your original DOB document. Step 4: Request DOB Update Tell the operator you want Aadhaar DOB Correction. Step 5: Biometric Verification Your fingerprint/IRIS scan will be taken. Step 6: Document Scanning Operator will scan your valid DOB proof. Step 7: Pay the Fee ₹50 is the standard fee for DOB update. Step 8: Receive Acknowledgment Slip This slip includes your URN to track the status. How to Check Aadhaar DOB Correction Status? Step 1: Visit UIDAI portal – https://myaadhaar.uidai.gov.in Step 2: Click “Check Aadhaar Update Status” Step 3: Enter Aadhaar Number + URN Step 4: View status: Important Rules for Aadhaar DOB Correction UIDAI has strict rules: ✔ Only ONE DOB update allowed in lifetime Unless exceptional approval is granted. ✔ DOB must match document exactly If any mismatch occurs, your request may be rejected. ✔ No handwritten DOB documents allowed ✔ DOB changes involving large year differences may require stronger proof Common Reasons for Aadhaar DOB Correction Rejection Benefits of Correcting Your Aadhaar DOB By completing Aadhaar DOB Correction, you ensure: Final Words Aadhaar DOB Correction is extremely important for maintaining accurate identity records. Whether you apply online or through an Aadhaar Seva Kendra, make sure you carry a valid DOB document and follow all UIDAI guidelines. Since DOB can be updated only once, double-check all details before submitting your request.

Link Aadhaar with TNEB
Aadhaar

🔌 TNEB Aadhaar Link: Complete Guide to Link Aadhaar with TNEB and Check Status

The Tamil Nadu Electricity Board (TNEB), operated by the Government of Tamil Nadu, is responsible for electricity generation and distribution across the state. Recently, the Tamil Nadu Generation and Distribution Corporation (TANGEDCO) has made it mandatory for all electricity consumers to link their Aadhaar card with TNEB. This step ensures transparent billing, access to government subsidies, and smoother power connection management. If you haven’t linked your Aadhaar yet, you may face issues while paying bills or availing free-unit benefits. Let’s go through everything you need to know about the TNEB Aadhaar linking process, its benefits, purpose, and how to check your link status online. 🎯 Purpose of Linking Aadhaar with TNEB The government introduced Aadhaar-TNEB linking to reduce misuse of electricity connections and ensure that subsidies reach genuine users.Previously, some people had multiple power connections under a single ID, leading to wastage and errors in billing. By linking Aadhaar, every consumer is uniquely identified, which promotes transparency and prevents corruption in electricity usage. 💡 Major Benefits of TNEB Aadhaar Linking The Tamil Nadu government has made this linkage compulsory because it helps both consumers and the electricity department.Here are the top advantages: 1️⃣ Lower Electricity Bills If your monthly electricity consumption is below 500 units, linking Aadhaar can make you eligible for up to 50% reduction in your bill. This greatly reduces the financial load on families and small consumers. 2️⃣ Accurate Billing & Efficiency With Aadhaar verification, all consumer data becomes streamlined — meaning more accurate meter readings, improved service delivery, and faster issue resolution. 3️⃣ Eligibility for Subsidies After linking Aadhaar, consumers can avail government subsidies, such as the first 100 units of electricity completely free. 4️⃣ Transparency in Connection Records Linking Aadhaar ensures that every electricity connection is properly recorded under one verified identity, preventing duplication or misuse. ⚡ Mandatory TNEB Aadhaar Link for Subsidy Users According to TANGEDCO, only consumers who link their Aadhaar number with their electricity service connection are eligible for free units and government subsidies.The rule applies to: Those who haven’t completed Aadhaar linking may not receive the subsidy benefits until they do so. 🧾 Step-by-Step Guide: How to Link Aadhaar with TNEB Online Follow these simple steps to complete your TNEB Aadhaar linking online from home: Step 1: Visit the official TANGEDCO website — https://www.tangedco.gov.in/ Step 2: Go to the ‘Online Services’ section and click on ‘Aadhaar-Link your service connection number’ under Consumer Services. Step 3: Enter your Service Connection Number, Mobile Number, and Captcha Code, then click ‘Enter’. Step 4: Your registered name will appear on the screen. Select your relationship to the service connection, such as: Step 5: Enter your Aadhaar Number, check the consent box, and click ‘Send OTP’. Step 6: Enter the OTP sent to your registered mobile number and click ‘Submit’. Your Aadhaar will now be successfully linked with your TNEB account. 🔍 How to Check TNEB Aadhaar Link Status Once the Aadhaar is linked, you’ll receive an SMS confirmation from TANGEDCO. However, you can also verify the status online anytime. Here’s how: Step 1: Visit the official website of TANGEDCO. Step 2: Click on ‘Online Services’, then go to ‘Bill Status’ under Payment and Billing Services. Step 3: Enter your Service Connection Number and Mobile Number, then click ‘Submit’. Step 4: The screen will display your account details along with the Aadhaar link status. That’s it! You’ve successfully checked your TNEB Aadhaar linking status. ✅ Why It’s Important to Complete the Linking Completing the Aadhaar linking process ensures: Hence, it’s essential for every consumer in Tamil Nadu to link Aadhaar with their TNEB account and enjoy uninterrupted electricity and subsidy benefits. 📚 FAQs

Scroll to Top