Author name: Nibha

Aadhaar Card Appointment
Aadhaar

⭐ Aadhaar Card Appointment: How to Book an Appointment for Aadhaar Card Update or New Aadhaar?

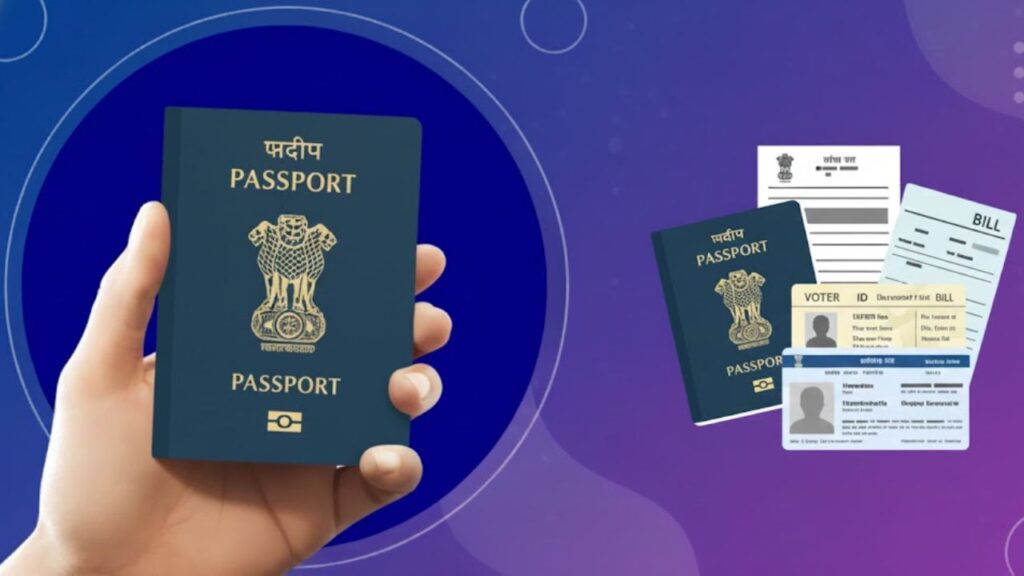
Whether you want to update your Aadhaar details or apply for a fresh Aadhaar card, the UIDAI now allows you to book an Aadhaar card appointment online. This makes the process faster, smoother, and more convenient—no more waiting in long queues at Aadhaar Seva Kendra (ASK). ⭐ What Is an Aadhaar Card Appointment? UIDAI provides an online facility where residents can schedule an appointment at their nearest Aadhaar Seva Kendra. Using this service, you can choose a date and time slot based on availability. You can book an appointment for: Key points: ⭐ Benefits of Booking an Aadhaar Appointment Online Booking an Aadhaar appointment online offers several advantages: ✔ Avoid long queues at ASK You can pick your preferred date and time, which reduces waiting time. ✔ Smooth and fast service Pre-scheduled appointments get priority handling at Aadhaar centers. ✔ Convenient for families Multiple family members can book slots from the same number. ✔ Saves time No need to walk in and wait for hours. ⭐ How to Book an Appointment for Aadhaar Card Update (Step-by-Step Guide) Follow these steps to book your Aadhaar appointment online: Step 1: Visit the official UIDAI website (uidai.gov.in) Step 2: Click on “My Aadhaar” → “Book an Appointment” Step 3: Select your city or Aadhaar Seva Kendra Step 4: Enter your mobile number and captcha Click Get OTP. Step 5: Enter OTP and proceed Step 6: Fill in your Aadhaar details and choose update services (Example: name update, address update, biometric update, mobile number update, etc.) You can pay fees online or at the center. Step 7: Choose your preferred date and time Step 8: Confirm the appointment Your appointment slip will appear on the screen. ⭐ Which Aadhaar Services Can You Access with an Appointment? You can complete the following services at Aadhaar Seva Kendra: ⭐ How to Cancel an Aadhaar Appointment? If you cannot visit the Aadhaar center, you can cancel your appointment online. Steps to Cancel Appointment: Your appointment will be cancelled instantly. ⭐ How to Reschedule an Aadhaar Appointment? If you want to change the date and time instead of canceling, follow these steps: Your new appointment details will be displayed on the screen. ⭐ Documents Required for Aadhaar Enrollment & Update UIDAI accepts the following documents: 📌 Proof of Identity (POI) 📌 Proof of Address (POA) 📌 Proof of Date of Birth (DOB) 📌 Proof of Relationship (POR) ⭐ How to Download Aadhaar Appointment Form To download your appointment slip: Your PDF will be saved to your device. ⭐ Aadhaar Update Charges at Aadhaar Seva Kendra Service Charges Aadhaar Enrollment Free Mandatory Biometric Update (Age 5–17) Free Any Biometric Update ₹100 Demographic Update (with biometric) Free Demographic Update (without biometric) ₹50 Document Update (Online myAadhaar) Free Document Update (At Aadhaar Centre) ₹50 ⭐ Important Tips Before Booking Your Aadhaar Appointment ✔ Appointment is optional, but recommended✔ You can book up to 4 appointments per month✔ Aadhaar-linked mobile number is not compulsory✔ Ensure you carry the correct documents✔ Reach the center 10–15 minutes early✔ There are limits on Aadhaar updates: If limits exceed, you must visit a Permanent Enrollment Centre. ⭐ Final Words Booking an Aadhaar appointment online is one of the easiest ways to avoid crowds and complete your Aadhaar-related work smoothly. Whether updating details or enrolling for the first time, choosing your own date and time ensures a comfortable and stress-free experience. Always carry valid documents, fill in details carefully, and reach on time to complete the process without delays. ⭐ FAQs

Income Tax

⭐ TDS Return Filing & Payment Due Dates for FY 2025–26: Complete Guide for Taxpayers

If you are a business owner, employer, freelancer, or anyone responsible for deducting TDS, then staying updated with TDS return filing and payment due dates is extremely important. Missing deadlines can lead to heavy interest, penalties, and late fees, and repeated delays may even trigger compliance notices from the Income Tax Department. ⭐ What Is TDS & Why Is It Important? TDS (Tax Deducted at Source) is a method where tax is deducted at the time of making payments like: The deductor must: ✔ deduct TDS at the correct rate✔ deposit TDS before the due date✔ file quarterly returns Timely filing ensures smooth credit to the deductee and prevents compliance issues. ⭐ TDS Return Filing Due Dates for FY 2025–26 Every deductor must file TDS returns quarterly. Below are the official due dates for FY 2025–26: Quarter Period Due Date Q1 1 Apr – 30 Jun 2025 31 July 2025 Q2 1 Jul – 30 Sept 2025 31 October 2025 Q3 1 Oct – 31 Dec 2025 31 January 2026 Q4 1 Jan – 31 Mar 2026 31 May 2026 👉 Quick Tip The return is due on the last day of the month after the quarter ends, except for Q4. ⭐ TDS Payment Due Dates for FY 2025–26 TDS deducted must be deposited by the 7th of the following month, except for March. Month of Deduction Payment Due Date April 2025 7 May 2025 May 2025 7 June 2025 June 2025 7 July 2025 July 2025 7 August 2025 August 2025 7 September 2025 September 2025 7 October 2025 October 2025 7 November 2025 November 2025 7 December 2025 December 2025 7 January 2026 January 2026 7 February 2026 February 2026 7 March 2026 March 2026 30 April 2026 📌 Rule for Government Deductors If TDS is deposited through book entry, it must be deposited same day. ⭐ Upcoming TDS Deadlines (Don’t Miss These!) 👉 Upcoming Payment Dates Month Due Date December 2025 7 Jan 2026 January 2026 7 Feb 2026 February 2026 7 Mar 2026 March 2026 30 Apr 2026 👉 Upcoming Return Filing Dates Quarter Due Date Q3 31 January 2026 Q4 31 May 2026 These reminders help avoid last-minute rush and penalties. ⭐ TDS Forms: Which One Should You File? Form Purpose 24Q Salary payments 26Q Non-salary (contractor, professional fees, interest, rent) 26QB TDS on property purchase 26QC TDS on rent (individuals) 26QD TDS under Section 194M 26QE TDS on crypto transactions 27Q Payments to non-residents 27EQ TCS return Choosing the correct form ensures error-free compliance. ⭐ Penalty for Late Filing of TDS/TCS Returns (Section 234E) If you miss the due date, a late fee of ₹200 per day is charged until you file the return. 📌 Important Conditions ✔ Example Let’s say: Late fee = 109 × 200 = ₹21,800But since TDS amount is ₹5,000, you pay only ₹5,000. ⭐ Penalty Under Section 271H Apart from late fees, the Income Tax Department may impose a penalty between ₹10,000 and ₹1,00,000 if: ✔ No Penalty if You Meet These 3 Conditions: ⭐ Interest on Late Deduction or Late Deposit of TDS 🔹 A. If TDS is Not Deducted Interest = 1% per monthPeriod = When tax should have been deducted → actual date of deduction 🔹 B. If TDS is Deducted but Not Deposited Interest = 1.5% per monthPeriod = Deduction date → actual date of deposit 📌 Note Even 1-day delay = full month counted. ⭐ Why Timely TDS Compliance Matters Timely filing avoids: ✔ penalties✔ late fees✔ interest charges✔ system errors✔ scrutiny notices It also ensures: ✔ smooth credit to deductees✔ clean tax record✔ better financial management ⭐ Final Thoughts TDS compliance may feel complicated, but once you understand the due dates and rules, it becomes much easier to manage.If you are a business, freelancer, deductor, or accountant, keeping track of the above timelines is extremely important. A single delay can lead to unnecessary financial burden—so staying updated is the best strategy. ⭐ FAQs

How to Write a Cancelled Cheque
Banking

How to Write a Cancelled Cheque? Meaning, Steps, Uses, Risks & Complete Guide

A cancelled cheque is one of the most commonly requested financial documents in India. Whether you are applying for a loan, starting a SIP, buying an insurance policy, withdrawing EPF, or completing KYC, banks and financial institutions often ask for a cancelled cheque to verify your bank account details. Although extremely simple to prepare, a cancelled cheque carries important information like your account number, branch, IFSC, and MICR code. Understanding how to write a cancelled cheque correctly and when it is required helps avoid mistakes and ensures smooth processing of financial services. This detailed guide explains the meaning of a cancelled cheque, how to write one step-by-step, its uses, risks, and precautions. ⭐ What Is a Cancelled Cheque? A cancelled cheque is a regular cheque from your chequebook on which the word “CANCELLED” is written across the front, usually between two parallel lines.Once cancelled, the cheque cannot be used for payment, withdrawal, or any type of fund transfer. Despite being unusable for transactions, the cheque still provides essential details such as: Because it displays all necessary financial identifiers, institutions use cancelled cheques for verification, not for payment. ⭐ How to Write (Cancel) a Cheque Correctly? Writing a cancelled cheque is extremely simple, but many people make mistakes. Follow these steps to cancel a cheque properly: 1. Take a Fresh Cheque Leaf Use any blank cheque from your chequebook. Do not fill in the name, amount, date, or signature. 2. Draw Two Parallel Lines Using a pen, draw two diagonal or horizontal parallel lines across the cheque. 3. Write “CANCELLED” Clearly Write the word CANCELLED in bold, capital letters between the lines.Make sure it does not hide important details like account number or IFSC code. 4. Do NOT Sign the Cheque Cancelled cheques should not be signed unless specifically requested (which is rare).A signature increases the risk of misuse. That’s it — your cancelled cheque is ready for documentation purposes. ⭐ Why Is a Cancelled Cheque Required? Cancelled cheques are used widely across banking, investments, insurance, and employment processes. Here are the most common reasons institutions ask for one: ✔ Loan Applications Banks require a cancelled cheque to confirm your bank details before disbursing loan amounts. ✔ Insurance Policies Insurance companies request cancelled cheques for: ✔ SIP & Mutual Fund Investments Before activating a SIP or processing withdrawals, mutual fund companies need to verify your bank account. ✔ EPF Withdrawal A cancelled cheque is mandatory to ensure that EPF withdrawal is sent to the correct bank account. ✔ KYC Verification Banks may require cancelled cheques when opening: ✔ Salary Account Setup Employers use cancelled cheques to confirm the employee’s salary account details. ✔ Income Tax Refunds Used to verify bank account information during income tax documentation and refunds. ⭐ Other Uses of a Cancelled Cheque Cancelled cheques are also useful for: ✔ Tracking payments✔ Maintaining financial records✔ Providing proof of bank details✔ Resolving payment disputes✔ Verifying high-value transactions They act as a simple assurance that the individual owns the bank account. ⭐ Risks Associated With Cancelled Cheques While cancelled cheques are mostly safe, they contain sensitive information. If misused, they can lead to banking or identity fraud. ❌ Fraudulent Use Someone may attempt unauthorized actions with your account details. ❌ Identity Theft Your name, bank account number, and branch can be misused for fraudulent applications. ❌ Unauthorized ECS Setup Rarely, someone could attempt to create unauthorized automatic debit instructions. ❌ Misplacement or Loss Losing a cancelled cheque exposes your banking information to strangers. ❌ Photocopy Misuse A cancelled cheque is a physical document that can be duplicated easily. ⭐ Precautions to Take When Giving a Cancelled Cheque To ensure safety, follow these guidelines: ✔ Do not sign the cancelled cheque✔ Write “CANCELLED” clearly and boldly✔ Never give extra blank cheques✔ Share only when absolutely necessary✔ Always hand it to trusted institutions✔ Avoid giving photocopies unless officially requested Being careful prevents fraud and unauthorized transactions. ⭐ Conclusion Cancelled cheques are simple yet important documents used for confirming bank account details in a wide range of financial processes, including loans, SIPs, insurance, salary setup, EPF withdrawal, and KYC. Writing a cancelled cheque is extremely easy, but it must be done correctly and handled responsibly to avoid misuse.Use cancelled cheques only when necessary and always ensure they are shared securely. For more easy-to-understand government guides and updates visit Sarkari Bakery ⭐ FAQ

What is MMID
Banking

What is MMID? Meaning, Full Form, Importance & How to Generate an MMID Code

Digital payments in India have evolved rapidly, and IMPS (Immediate Payment Service) remains one of the fastest and most reliable ways to transfer money instantly. One of the essential elements required for IMPS transfers is the MMID — a unique number linked to your mobile banking account. MMID makes mobile-based fund transfers simple, fast, and secure. Instead of entering long bank details like account number and IFSC code, the sender only needs the receiver’s mobile number + MMID to complete the IMPS transaction. This guide explains what MMID means, why it is used, its benefits, and step-by-step methods to generate and use an MMID code. ⭐ What is MMID? (Meaning & Full Form) MMID stands for Mobile Money Identifier.It is a unique 7-digit code assigned by banks to customers who use mobile banking. Each MMID is linked to: When making an IMPS transfer through a mobile banking app, ATM, or SMS banking, this MMID helps the bank identify the correct account linked with the mobile number. Key Point: Each bank account has its own MMID. If you have three accounts in the same bank, each one gets a separate MMID. ⭐ Why is MMID Required? Before IMPS, transfers through NEFT or RTGS required: IMPS simplified this process. With MMID, the sender only needs: ✔ Receiver’s mobile number✔ Receiver’s MMID This ensures secure, immediate transfers without sharing sensitive bank details. MMID acts as a bridge between your mobile number and bank account, making IMPS transactions quick and error-free. ⭐ Benefits of MMID MMID improves mobile banking convenience in several ways: ✔ 1. Unique Identifier Every MMID is linked to a specific account, ensuring accurate money transfers. ✔ 2. Linked to Mobile Number Helps process payments quickly without entering bank details. ✔ 3. Multiple Accounts Supported You can generate different MMIDs for each account you hold in a bank. ✔ 4. Instant Transfers via IMPS IMPS works 24×7, even on holidays — MMID enables these instant transfers. ✔ 5. Enhanced Security Reduces the risk of incorrect transfers by pairing mobile number + MMID. ⭐ Significance of MMID MMID plays a vital role for users who prefer mobile banking over internet banking.Since most Indians own a mobile phone, MMID ensures: ✔ Money transfers without needing a computer✔ No need to share account or IFSC details✔ Better privacy and reduced fraud risk It has made IMPS one of the most popular instant transfer methods in India. ⭐ How to Find Your MMID Number? You can easily find your MMID using these steps: Method 1: Mobile Banking App Your MMID will be displayed instantly. Method 2: Internet Banking Method 3: Branch Visit Ask the bank staff to print your MMID for your accounts. ⭐ How to Generate MMID Code? You can generate an MMID through several methods depending on your bank. ✔ 1. Generate MMID Through Phone Banking (Usually within a few minutes to 24 hours) ✔ 2. Generate MMID Through Mobile Banking ✔ 3. Generate MMID Through Internet Banking ⭐ How to Use MMID for Interbank Fund Transfers? You can transfer money using MMID through: ✔ Mobile banking✔ Internet banking✔ ATM✔ SMS banking Using Mobile or Internet Banking The money will be transferred instantly. Using ATM Using SMS Banking Your bank will process the IMPS transfer. ⭐ How to Receive Money Using MMID? Receiving money is simple: IMPS using MMID is one of the fastest ways to receive money. ⭐ Important Things to Keep in Mind When Using MMID ✔ Always double-check the recipient’s MMID✔ Keep your MPIN secret✔ Verify entered amount before confirming✔ Never share OTP with anyone✔ Keep mobile banking credentials secure✔ Beware of phishing SMS asking for MMID✔ Check your bank statements regularly✔ Make sure your mobile number is updated These precautions reduce risk and ensure smooth IMPS transfers. ⭐ Conclusion MMID (Mobile Money Identifier) is a simple yet powerful feature that enables fast and secure mobile-based IMPS fund transfers. Whether you are sending or receiving money, MMID ensures accurate and instant processing without the need to share sensitive bank details. With growing digital payments, MMID remains extremely useful for users who rely on mobile banking. Just make sure to keep your MMID, MPIN, and OTP details confidential to avoid misuse. For more easy-to-understand government guides and updates visit Sarkari Bakery ⭐ FAQ

Public Provident Fund (PPF) Scheme
Savings

Public Provident Fund (PPF) Scheme – Interest Rate 2025, New Rules, Tax Benefits & Complete Investment Guide

The Public Provident Fund (PPF) is one of India’s most trusted long-term investment schemes. Launched by the Government of India, it provides guaranteed returns, complete safety, and multiple tax benefits — making it ideal for individuals who want stable returns without market risk. Despite being introduced decades ago, PPF continues to stay relevant because of its strong features: fixed interest rate, tax-free maturity, long-term compounding, and complete government backing. As financial planning awareness grows, more investors are choosing PPF for retirement planning, children’s education, and tax-saving purposes. ⭐ Key Highlights of PPF Scheme 2025 Feature Details Interest Rate (FY 2025–26) 7.1% per annum (compounded annually) Minimum Investment ₹500 per year Maximum Investment ₹1.5 lakh per financial year Tax Benefit Full tax exemption (EEE) + Section 80C deduction Tenure 15 years, extendable in 5-year blocks Withdrawals Partial after 5 years; full at maturity Loan Facility Available from 1st year up to 25% of balance Risk Profile Zero-risk, government-guaranteed Eligibility Resident Individuals, minors (via guardians) Account Opening Bank or Post Office; eKYC Aadhaar opening available ⭐ What Is a PPF Account? A PPF account is a long-term savings account backed by the Government of India. It helps individuals create a stable financial corpus through fixed, guaranteed returns and tax benefits. Unlike mutual funds or equities, where returns may fluctuate, PPF offers predictability with safety — making it highly suitable for conservative investors. In July 2025, the government introduced Aadhaar-based biometric eKYC, enabling users to open PPF accounts online instantly without paperwork. Deposits and withdrawals through digital mode have also become more convenient. A PPF account is especially beneficial for: ⭐ PPF Interest Rate 2025–26 The PPF interest rate is decided by the Ministry of Finance every quarter. For FY 2025–26, the rate remains unchanged at 7.1% per annum. How Interest Is Calculated Tip: Investors should deposit before the 5th of each month to maximize interest. ⭐ Why PPF Is an Important Investment Option PPF is more than just a tax-saving scheme. It is designed for long-term financial discipline and offers unmatched safety. ✔ Government-Guaranteed Your money is 100% safe from market volatility. ✔ Long-Term Wealth Creation A 15-year tenure ensures deep compounding, useful for retirement. ✔ Tax-Free Growth PPF follows the EEE (Exempt-Exempt-Exempt) model. ✔ Ideal for Risk-Averse Investors If you prefer stable returns rather than fluctuating markets, PPF is perfect. ✔ Helps in Portfolio Diversification Balances high-risk investments such as equity mutual funds or stocks. ⭐ Key Features of the PPF Scheme Feature Description Interest Rate 7.1% p.a. Minimum Deposit ₹500 per year Maximum Deposit ₹1.5 lakh per year Tenure 15 years Tax Benefits 80C + Tax-free returns + Tax-free maturity Risk Zero-risk, government-backed Eligibility Indian residents only Minors Allowed (guardian-operated) Additional rules: ⭐ Tenure, Extensions & Contribution Rules ✔ Default Tenure 15 years lock-in. ✔ Extension Options After maturity, you can: ✔ Contribution Rules ✔ Reactivation of Inactive PPF Account If you miss contributions: ⭐ Loan Against PPF PPF allows a loan against your balance. Criteria Details Eligible From End of 1st year until 6th year Loan Amount Up to 25% of balance Loan Interest 1% if repaid within 36 months; 6% thereafter Second Loan Only after first loan is cleared This protects users from taking expensive personal loans. ⭐ PPF Withdrawal Rules PPF offers various withdrawal options, depending on tenure. ✔ Full Withdrawal Allowed only on maturity (after 15 years). ✔ Partial Withdrawal Allowed after 5 financial years. Allowed Amount: ✔ Premature Closure Allowed only in special cases: Supporting documents must be submitted. ⭐ PPF Online Calculator A PPF calculator helps estimate: It is recommended for retirement planning or children’s future planning. ⭐ Tax Benefits of PPF (EEE Category) PPF is one of the very few investments offering triple tax benefits: ✔ Tax Deduction (Section 80C) ✔ Tax-Free Interest ✔ Tax-Free Maturity ⭐ How to Open a PPF Account (Bank/Post Office) PPF accounts can be opened in: ✔ Post Offices✔ Nationalized Banks✔ Private Banks like ICICI, HDFC, Axis, Kotak Required Documents: ⭐ How to Open a PPF Account Online (Step-by-Step) Step 1: Log into mobile/internet banking.Step 2: Select Open PPF Account.Step 3: Choose Self / Minor Account.Step 4: Fill personal and nominee details.Step 5: Enter deposit amount.Step 6: Authenticate via OTP.Step 7: PPF account number gets generated instantly. ⭐ How to Open a PPF Account in Post Office Step 1: Get Form A from post office or download online.Step 2: Submit form with KYC documents.Step 3: Deposit opening amount.Step 4: Receive your passbook. ⭐ PPF Withdrawal Form (Form C) This form has 3 sections: Attach: ⭐ How to Close a PPF Account A PPF account can be closed only after 15 years. Steps: ⭐ How to Transfer a PPF Account You can transfer: No online transfer facility exists yet. Process: ⭐ Banks Offering PPF Accounts ⭐ How to Link Aadhaar to PPF Account ⭐ How to Activate an Inactive PPF Account ⭐ Conclusion The Public Provident Fund (PPF) remains one of the safest and most rewarding long-term investment options for Indian citizens. With guaranteed returns, excellent tax benefits, flexible withdrawal options, and complete government security, it is an ideal choice for individuals seeking predictable and stable wealth creation. However, investors should also consider its long tenure and moderate returns when planning their financial strategy. For more easy-to-understand government guides and updates visit Sarkari Bakery ⭐ FAQs

Documents Required for Passport in India
Passport

List of Documents Required for Passport in India (Complete Guide for New, Renewal, Reissue, Tatkaal & Minors)

A passport is one of the most important identity documents issued by the Government of India. Whether you plan to travel internationally, apply for visas, study abroad, or use it as an identity document, having a valid passport is essential. The process of applying for a passport is simple, but it requires submitting a proper set of documents that verify your personal details, address, age, and citizenship. The type of passport application—new, renewal, reissue, Tatkaal, minor, or diplomatic—determines exactly which documents you must provide. Submitting incorrect or incomplete documents can delay your appointment or cause your application to be put on hold. This detailed guide explains every category of passport documentation in India, why each document is required, common mistakes applicants make, and how to ensure a smooth, hassle-free passport approval. ⭐ What Are the Required Documents for an Indian Passport? The documents required for a passport act as proof of: Depending on whether you’re applying for a new passport, renewal, reissue, Tatkaal, or a minor’s passport, the list of documents may vary slightly. Before your Passport Seva Kendra (PSK) appointment, ensure that: ⭐ Documents Required for a New Passport Applying for a new passport is the most common category for first-time applicants. The PSK verifies your identity, your current address, and your date of birth. ✔ 1. Address Proof (Any one document) Accepted proof includes: Why it’s required:Your passport must contain your current residential address, and police verification is based on this address. ✔ 2. Date of Birth Proof (Any one document) Why it’s required:The passport office must verify your exact date of birth to issue a correct passport booklet. ✔ 3. Photo Identity Proof (Any one) Most accepted options include: Note: Aadhaar is the most preferred document as it confirms both identity and address. ✔ 4. Passport Size Photographs PSKs now capture your photo digitally, but physical photographs may still be requested. ✔ 5. Old Passport (if any) If you previously held a passport (even expired), it must be submitted. ✔ 6. Additional Case-Based Documents Applicants with special circumstances (single parents, adoption, name change, etc.) may need additional documents. Always check Passport Seva Portal for updated requirements. ⭐ Documents Required for Minor’s Passport A child below 18 years is considered a minor for passport application. Minor passports have special rules, verification procedures, and required documents. ✔ Required Documents Important Notes for Minor Applications: Why these documents matter:Minors are not verified through address or police verification in the same way as adults. Parental identity and address proofs confirm the minor’s residence and citizenship. ⭐ Documents Required for Reissue of Minor’s Passport A minor’s passport may require reissue in cases of: ✔ Required Documents: ⭐ Documents Required for Passport Appointment These are the standard documents you must always carry for your PSK appointment: Address Proof: Aadhaar, Voter ID, bank statement, bills, rent agreement, or IT assessment. Date of Birth Proof: Birth certificate, Aadhaar, PAN, or driving licence. Identity Proof: Aadhaar, PAN, Voter ID, DL. Photographs: Two recent passport-sized photos. Old Passport: If applicable. ⭐ Documents Required for Passport Renewal Renewal applies to passports that are about to expire or have already expired. ✔ Required Documents: ⭐ Documents Required for Passport Reissue Reissue is different from renewal. Reissue happens when: ✔ Required Documents: 1. Old Passport 2. DOB Proof Same as earlier categories. 3. Address Proof Same list as renewal. 4. Photographs Two recent photos. 5. Additional Case-Based Documents ⭐ Documents Required for Tatkaal Passport Tatkaal passports require stricter checks due to faster processing. ✔ Mandatory Documents: Tatkaal applicants may be asked for additional documents depending on the urgency and verification level. ⭐ Documents Required for Diplomatic or Official Passport These passports are issued to: ✔ Required Documents: These applications follow a specialized verification process. ⭐ Conclusion Whether you’re applying for a new passport, renewing an old one, seeking a Tatkaal passport, or applying for your child, having the correct documents is the key to a smooth experience. Submitting clear, self-attested copies and carrying all originals ensures faster verification at the Passport Seva Kendra. Passport documentation may vary slightly depending on individual circumstances, so always check the official Passport Seva Portal before your appointment. For more easy-to-understand government guides and updates visit Sarkari Bakery ⭐ FAQ

Sanchar Saathi App
Sanchar Saathi

Sanchar Saathi App: What It Is, How It Works, Why India Rolled Back the Mandatory Installation Order?

India’s digital ecosystem is growing at an unprecedented pace, with more than 1.2 billion mobile users actively relying on smartphones for communication, banking, and essential government services. With this explosion in digital activity, cyber fraud and online scams have also increased dramatically.To combat these threats and empower citizens with cyber protection tools, the Government of India introduced the Sanchar Saathi App, a state-run digital safety platform. But recently, the app became the center of a nationwide debate when the government issued an order mandating smartphone manufacturers to pre-install the Sanchar Saathi App on all new devices, without giving users the option to disable or remove it. The order triggered widespread backlash, raising questions around privacy, surveillance, and user rights. Just days later, following strong opposition from consumers, privacy advocates, and even smartphone giants like Apple and Samsung, the government withdrew the mandatory installation directive. This article provides a complete overview of the Sanchar Saathi App—what it is, how it works, why the order was issued, why it was withdrawn, and whether the app is safe for users. ⭐ What Is the Sanchar Saathi App? Sanchar Saathi is a cyber-safety and mobile security application launched by the Indian government.The primary purpose of the app is: The government has repeatedly clarified that the app is not a surveillance tool and does not collect private user data beyond what is necessary for safety purposes. ⭐ Key Features of Sanchar Saathi App (Explained in Detail) The app offers several important features intended to make digital usage safer for Indian citizens: 1. CEIR (Central Equipment Identity Register) – Track & Block Lost Phones Through the CEIR system, users can: This helps significantly reduce mobile theft and illegal handset trafficking. 2. Mobile Connection Verification Users can check how many mobile numbers are registered under their ID.This helps identify: This feature alone has helped thousands detect unauthorised mobile numbers linked to their identity. 3. Reporting Fraud & Scam Incidents So far, 14 million users have downloaded the app, contributing to reporting: On one day alone, more than 600,000 new users registered—an increase of nearly 10x. 4. “Jan Bhagidari” Citizen Participation Model The app promotes citizen involvement by letting users: The government emphasises that the app’s purpose is public safety, not surveillance. 5. Secure & Optional Usage The government clarified the following: ⭐ Why Did the Government Want It Pre-Installed on All Smartphones? The government proposed mandatory pre-installation to: With the rapid rise of digital scams, the Ministry of Communications believed this mandate could accelerate public safety. ⭐ Why Did the Order Trigger Public Backlash? As soon as the directive surfaced, it faced immediate criticism from: The concerns included: ❌ 1. No Option to Disable or Remove the App Users were worried about losing control over their own devices. ❌ 2. Fear of Surveillance Despite government assurances, some believed mandatory installation could lead to: ❌ 3. Lack of Consultation Major smartphone companies reportedly stated: ❌ 4. Legal Concerns Digital advocacy groups pointed out: ⭐ Why Did the Government Withdraw the Order? On Wednesday, the government officially scrapped the pre-installation requirement, citing: ✔ Growing voluntary adoption The app already has more than 1.4 crore downloads. ✔ Massive increase in daily user registrations More than 6 lakh users downloaded it in a single day. ✔ Positive citizen response to fraud reporting Over 2,000 fraud cases are being reported every day. ✔ Pushback from major smartphone makers Apple and Samsung refused to comply without proper consultation. ✔ Public concerns over privacy Avoiding further controversy was necessary. Despite withdrawing the order, the government maintained: “Snooping is neither possible nor will it happen with the Sanchar Saathi safety app.” Digital rights groups welcomed the reversal but said they will wait for the full legal order. ⭐ Is the Sanchar Saathi App Safe? According to the government: Cyber experts agree the app is useful but insist that transparency and optional installation are necessary for public trust. ⭐ Why the App Still Matters (Even Without Mandate) India faces massive cyber fraud challenges: The Sanchar Saathi app helps citizens: ✔ Detect unauthorized mobile connections✔ Report scams instantly✔ Protect stolen devices✔ Stay alert against cybercriminals As adoption grows, it may become one of India’s most important digital safety tools. ⭐ Conclusion The Sanchar Saathi App remains a powerful tool for cyber safety in India, offering practical features to protect citizens from fraud, identity theft, and mobile misuse. While the government’s initial attempt to mandate the app raised valid concerns about privacy and user freedom, withdrawing the order has helped restore public confidence. Today, citizens can voluntarily download the app and use it as an added layer of protection—without fear of surveillance or forced installation. For more easy explanations on government services and digital safety, keep visiting Sarkari Bakery—we simplify everything for you.

How to Vote in India
How To

⭐ How to Vote in India: Complete Voter Registration & Voting Process Explained

India is the world’s largest democracy, and voting is the most powerful tool that every citizen has to shape the future of the nation. Each vote influences which leaders come into power and how India’s policies, economy, infrastructure, and development move forward. But many citizens, especially first-time voters, are still confused about how to vote in India, how to register as a voter, what documents are needed, and what to expect on election day. This comprehensive guide explains everything about voting in India, and by the end of this guide, you will fully understand how to vote in India — from registration to casting your vote at the polling station. ⭐ What Does Voting Mean in India? Voting is the constitutional right of every Indian citizen aged 18 or above.It allows citizens to choose: Your vote directly influences the leadership and direction of the country. Not voting means letting someone else choose for you. ⭐ Why Voting Is Important Voting has multiple roles in Indian democracy: ✔ Helps elect responsible government✔ Protects citizens’ rights✔ Ensures accountability of leaders✔ Reflects public opinion✔ Encourages participation in nation-building When citizens do not vote, democracy becomes weak.When more people vote, democracy becomes stronger. ⭐ Eligibility Criteria: Who Can Vote in India? To vote in India, you must: ✔ Be a citizen of India✔ Be 18 years or older on January 1 of the year✔ Have a permanent residential address✔ Be mentally sound✔ Not be disqualified under law Not eligible: ✘ Foreign citizens (even if living in India)✘ People declared mentally unsound by a court✘ Individuals convicted of certain criminal offences✘ Persons serving prison sentences ⭐ What Is Voter Registration in India? Voter registration is the process of adding your name to the Electoral Roll, which is an official list of all eligible voters. Once your name appears in the roll, you receive a Voter ID (EPIC card) and can vote in any upcoming election. Without voter registration, you cannot vote, even if you are 18+. ⭐ Documents Required for Voter Registration To register as a voter in India, you need the following: ✔ Address Proof (Any 1) ✔ Date of Birth Proof (Any 1) ✔ Other Requirements ⭐ Forms Required for Voter Registration Form Purpose Form 6 New voter registration Form 6A Registration for NRI voters Form 6B Aadhaar seeding with Voter ID Form 7 Deletion of name from electoral roll Form 8 Correction or updating details ⭐ How to Register to Vote Online (Step-by-Step Guide) This is the fastest and most widely used method. Step 1: Visit the Voter Services Portal (NVSP). Step 2: Click on Sign Up, enter your mobile number, email, and captcha. Step 3: Create an account by entering: Step 4: Enter OTP and verify your account. Step 5: Click Login → Enter mobile number, password, and captcha. Step 6: Click Form 6 – New Voter Registration. Step 7: Fill in the following details: Step 8: Preview and submit your application. Step 9: You will get a Reference ID for tracking your status. Step 10: The Booth Level Officer (BLO) will visit your home for verification. Step 11: Once approved, you will receive your Voter ID via:✔ Post✔ Or email/PDF (in some states) Your name will now appear in the electoral roll. ⭐ How to Register to Vote Offline (Form 6) If you prefer offline registration: Step 1: Visit your nearest: Step 2: Ask for Form 6 or download it from the NVSP portal. Step 3: Fill form with complete accuracy. Step 4: Attach all required documents. Step 5: Submit to the BLO. Step 6: Verification will be done at your address. Step 7: Once approved, your Voter ID will be issued. ⭐ Verification Process After Registration After you submit your application: If anything is incorrect → Application is rejected.You can reapply with correct details. If everything is correct → You receive your Voter ID within 15–21 days. ⭐ How to Check Voter Registration Status Step 1: Go to Voter Services Portal. Step 2: Login using mobile number. Step 3: Click Track Application Status. Step 4: Enter Reference Number. You will see: ⭐ How to Vote in India on Election Day (Complete Procedure) This is the most important section for your keyword – How to Vote in India. Here is what you need to do: ✔️ Step 1: Find Your Polling Booth Use any of these: ✔️ Step 2: Carry an Acceptable ID You can vote using: ✔️ Step 3: Stand in Queue There are separate queues for males, females, and senior citizens. ✔️ Step 4: Identity Verification at the Desk The polling officer will: ✔️ Step 5: Apply Ink to Your Finger Indelible ink is applied to prevent double voting. ✔️ Step 6: Cast Your Vote Using the EVM Inside the voting compartment: ✔️ Step 7: Exit the Booth Your vote is successfully cast! ⭐ Mistakes to Avoid While Registering for a Voter ID ❌ Using the wrong form (Form 6 vs Form 8)❌ Uploading incorrect documents❌ Entering wrong address❌ Spelling errors❌ Using old/invalid proofs❌ Not tracking status Correct details ensure faster verification. ⭐ Conclusion Voting is not just a right — it’s a responsibility that shapes the future of the country.Whether you’re a first-time voter or someone updating your voter details, the entire process is simple, transparent, and accessible. By registering on time and following the correct steps, you can easily cast your vote and contribute to India’s democratic process. For more such helpful government guides, visit:👉 Sarkari Bakery ⭐ FAQ

How to Delete Google Pay Transaction History
How To

⭐ How to Delete Google Pay Transaction History Permanently?

Google Pay (GPay) keeps detailed records of your UPI transfers, bill payments, card transactions, and activity logs. If you are concerned about privacy or no longer use the app, it becomes important to know how to delete Google Pay transaction history permanently. Here is a complete guide to remove your transaction activity using both mobile and desktop, along with the method to delete specific payments. 🔹 Ways to Delete Google Pay Transaction History Google Pay allows you to manage and delete your activity through your Google Account, not directly from the Google Pay app.To delete the transaction history, you can use: ✔ Method 1: Through Google Pay App (Mobile) ✔ Method 2: Through Google Account on Desktop Both options allow deleting: 📱 How to Delete Google Pay Transaction History Using Mobile App? Follow these steps to remove your Google Pay activity from your mobile: Step 1: Open the Google Pay app. Step 2: Tap the profile picture at the top right. Step 3: Go to Settings → Privacy & Security → Data & Personalisation. Step 4: Tap on Google Account. Step 5: Sign in using your Google credentials. Step 6: You will now see all your Google Pay activities. Step 7: Select the activity you want to delete. Step 8: Choose Delete and select: 🕑 Note: Google may take up to 12 hours to completely remove the activity from your Google Pay app. 💻 How to Delete Google Pay Transaction History on Desktop? If you’re using a computer, follow these steps: Step 1: Visit Google My Activity: Google My Activity page Step 2: Log in to your Google account. Step 3: Scroll down to find your Google Pay activity. Step 4: Select the transaction you want to delete. Step 5: Click Delete. Step 6: Choose your preferred delete option: This removes the selected parts of your Google Pay transaction history. 🗑 How to Delete a Specific Transaction in Google Pay? To delete only one particular payment: Step 1: Open Google Pay. Step 2: Tap your profile photo. Step 3: Go to Settings → Privacy & Security → Data & Personalisation. Step 4: Tap Google Account. Step 5: Sign in. Step 6: Scroll down and delete the single payment you want to remove. This lets you erase only one activity instead of the entire history. Know More About: ⭐ How to Delete PhonePe Transaction History Permanently? ⚠️ Important: Is It Truly “Permanent”? Deleting transaction activity only removes it from your account’s interface. 🔸 Google may still temporarily store deleted data for reasons like: ✔ If you want 100% permanent deletion, you must delete or deactivate your Google Pay account, after which Google clears all saved payments and activity according to their data retention policy. 🧾 Why You May Want to Delete Google Pay History 🔐 Does Google Pay Allow Turning Off Transaction History? No.Google Pay does not allow users to disable the recording of transactions.However, you can: 🎯 Final Thoughts Deleting Google Pay transaction history is simple, but it does not permanently erase data immediately from Google’s servers. The only way to ensure nothing remains is by closing your Google Pay account entirely. Still, deleting activity from the app or Google My Activity page helps maintain privacy and keeps your transaction list clean. ❓ FAQs

How to Download Form 49B
How To

⭐ Form 49B: What It Is, How to Fill It & Download TAN Application Form

Form 49B is the official application form used to apply for a Tax Deduction and Collection Account Number (TAN). Any individual, business, or organisation responsible for deducting TDS or collecting TCS must obtain a TAN under Section 203A of the Income Tax Act, 1961. TAN is a 10-digit alphanumeric number and is compulsory for: If a deductor does not have TAN or fails to quote it where required, a penalty of ₹10,000 may be imposed under Section 272BB. Before applying for TAN, it is important to understand how Form 49B works, what documents are needed, and how to fill the form accurately. ⭐ Why is TAN Necessary? TAN is mandatory for: ✔ 1. Filing TDS/TCS Returns Every TDS/TCS return must contain TAN. Returns without TAN are not processed. ✔ 2. Depositing TDS Payments The challan (ITNS 281) requires TAN details. ✔ 3. Avoiding Penalties A penalty of ₹10,000 applies for not having TAN or not quoting it. ✔ 4. Identification of Deductor TAN helps the Income Tax Department track TDS/TCS activities of the deductor. ⭐ What Is Form 49B? Form 49B is the TAN application form used when applying for a new TAN offline or online through NSDL/Protean. This form can be used by: However, companies being newly registered under the Companies Act 2013 get TAN automatically through the SPICe (INC-32) form. ⭐ How to Download Form 49B Online (Step-by-Step Guide) ⭐ Download Form 49B (Direct Link) 👉 You can download Form 49B PDF from here: Follow the steps below to download the TAN application form online: Step 1: Visit the official website:👉 https://tin.tin.nsdl.com/tan/ Step 2: Click on “Online Application for TAN (Form 49B)”. Step 3: Scroll to the bottom and select your Category of Deductor. Step 4: Form 49B will appear on the screen. Fill out the details and click Confirm. Step 5: Enter: Step 6: Click Submit. Step 7: An Acknowledgement Slip will appear with: Step 8: Download the acknowledgement slip. Step 9: Sign it and send it with supporting documents to: NSDL e-Governance Infrastructure Ltd.,5th Floor, Mantri Sterling, Plot No. 341,Model Colony, Pune – 411016 ⭐ How to Fill Form 49B Correctly Form 49B must be filled carefully, as incorrect entries can lead to rejection. ✔ Use BLOCK letters ✔ One character per box ✔ No overwriting ✔ All fields should be filled ✔ Information must match official documents Important Sections to Fill: 1. Applicant Details Enter name, designation, and type of entity. 2. Address Details Provide full Indian address (mandatory). 3. Assessing Officer Details Fill: You can find these at: 4. Contact Information Provide mobile number & email ID. 5. Signature / Thumb Impression If using thumb impression, it must be attested by: 6. Acknowledgement Submission Sign and courier the slip to NSDL within the given time. ⭐ TAN Application Fee & Payment Modes The fee for applying for TAN is: 💰 ₹77 (₹65 + 18% GST) You can pay via: If paying via cheque/DD: ⭐ Who Can Apply and Sign Form 49B? Applicant Type Authorised Person Individual / Proprietor Individual HUF Karta Company Director Firm / LLP Partner Trust / AOP / BOI Authorised Signatory ⭐ What Happens After Form 49B Submission? Once NSDL receives: ✔ Acknowledgement slip✔ Required documents✔ Payment confirmation Your TAN application is processed in 7–15 working days. The TAN will then be: ⭐ Conclusion Form 49B is an essential form for anyone who deducts or collects tax at source. Whether you’re applying online or offline, make sure to fill the form carefully and follow all steps correctly. For more government form guides, certificate formats, and easy-to-follow tutorials, visit:👉 Sarkari Bakery ⭐ FAQ

Scroll to Top